If you are a blogger or instagrammer that has tried to monetize your platform you’ve probably read all the articles spouting advice like get “affiliates” and “sponsorships” to monetize. And that is all well and good, but how do you actually get people to click those links? Because you can have all the money making links in the world but if no one clicks them then you’re not making shit.
Or maybe you have a small business or or product based start up and you need photos for your website, social media, or email news letter.
The best way to get your reader/customers to click and buy a product you are promoting is to make them think that they need that product, that if they have that product they too can have that glamorous, adventurous, amazing life. I’ve found that the best way to do that is through lifestyle photography.
You see lifestyle photography selling products everywhere, on Instagram, on TV, in print. Happy people out in the world having fun, you might not even notice the product they are promoting at first. And that’s ok. You are being sold a lifestyle, something to aspire to, and if you buy that product it’ll get you one step closer.
So now the big question, how the heck do you take those kinds of photos, to sell the products, get the clicks, and make the money?
First, what is a lifestyle product photo?
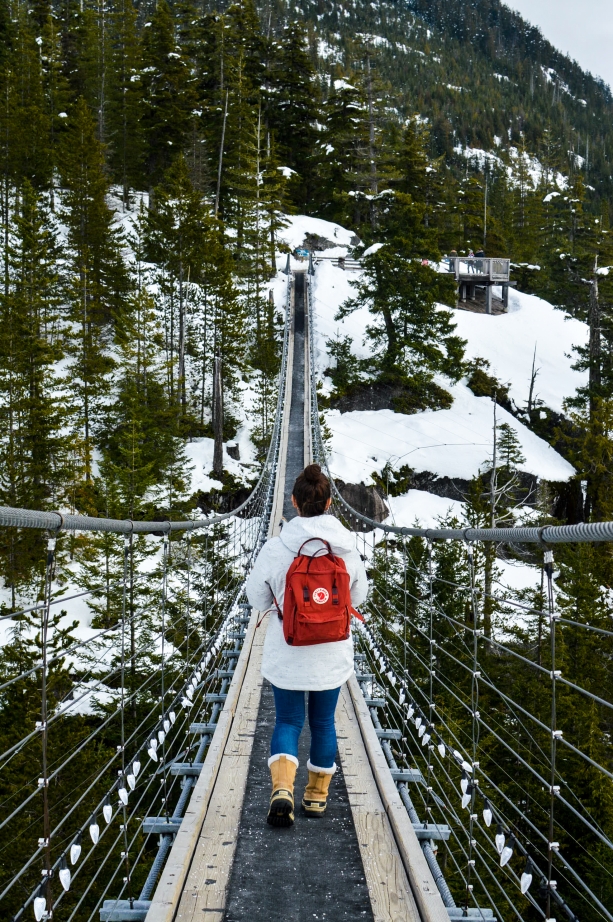
A lifestyle product photo shows the product out in a real world setting and/or situation. For example, if the product is a backpack, photograph someone wearing the backpack out on a hike with a scenic background. Not only are you showcasing the backpack but you are also selling the outdoorsy adventurous lifestyle that you could have if you have that backpack.

How to take lifestyle product photos
- The products: If you’re a blogger/influencer only partner with companies that fit into your niche, aesthetic, or genre. Early on in my blogging career I fell into the ‘detox tea trap’. Back in like 2017 it was really easy to get detox tea sponsorships, I bet you probably remember this, literally everyone was selling and posting about it. So I got one of those sponsorships and posted about this tea on both my blog and Instagram. The problem was, I am not a health or wellness or food blogger. I write about travel, the outdoors, and being a digital nomad. Detox tea really doesn’t fit into those categories. Those posts looked super out of place, awkward, and forced, and if you partner with a brand that doesn’t fit with your usual topics your posts will also look out of place and weird.

- Planning the shoot: Figure out the story you want to tell with the product(s). It could be as simple as ‘having breakfast while camping’. From there you can plan your locations, the time of day you want to shoot and get some ideas for a shot list.


- Making a shot list: Having a shot list is important for making sure you get all the photos of the product you need. I like to get inspiration from Pinterest and then brainstorm shot ideas from there. As a general rule I try to get 3 types of shots.
- Long shots – these shots show a lot of background, and give context for the story and the product may not be the central focus of the photo.
- Medium shots – these shots are a bit closer in, they still show some background but the product is more the focus of the photo.
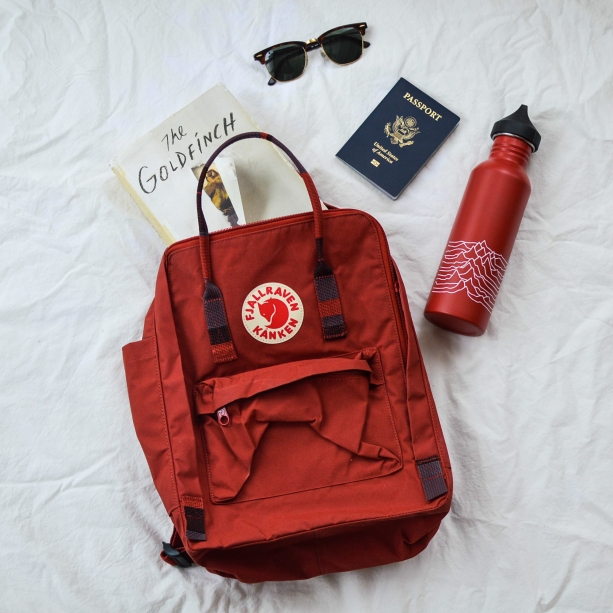
- Close up shots – these are close ups of the product without much background to distract from it. They show the product in detail.


- Getting the shots: You’ve got your theme or story, you’ve got your location, and you’ve got your shot list, now it’s time to go take some pictures. Make sure to get all the shots on your list, but also get creative in the moment, and if you have ideas on the spot try them out. Make sure to pay attention to where your light source is coming from and what kinds of shadows are happening and where they are falling. You can use shadows to your advantage but if you’re not paying attention they can ruin a good photo.

Also make sure that any props your are using compliment the product you are trying to highlight. You obviously want to use props that would normally be used with the product, but also pay attention to color and pattern as well as the amount of props used.

- Editing: Even the best pictures sometimes need a little editing. I use Adobe Lightroom to edit my photos. And if you don’t want to spend a whole lot of time editing you can always buy Lightroom presets – basically fancy filters – to apply to your photos. When editing, the things I usually look out for are:
- Making sure the horizon line is level.
- Exposure, how bright or dark the photo is and adjusting accordingly .
- Shadows, highlights, and contrast – for a brighter air-y feel I brighten shadows up and decrease contrast, or for a moodier feel I’ll increase contrast and darken shadows and highlights.
- If there is a specific color I want to bring out, usually the color of the product, I’ll increase the saturation and vibrance of that color.

This brings me to my new venture! I am taking all those years of experience taking product photos for this blog and Instagram along with a boat load of knowledge of locations from years of traveling and turning it into a photography company. HiAnsel is an on-demand product photography studio specializing in lifestyle product photos around the world.
If your small business or start up needs product photos but doesn’t want to deal with the hassle of planning a photoshoot and hiring a photographer that is where HiAnsel comes in. All you need to do is fill out a quick survey about the kinds of photos you want, we’ll have a quick chat to iron out the details and we take care of all the rest. From creative planning to execution and delivery, we want to take something off your plate and deliver high quality content that is ready to use.
For more info and our portfolio check out www.hiansel.com or our instagram – @hianselphoto.
READ MORE:
Getting Paid for Content Creation
How to Start a Creative Career
Like this post? Pin it!


